
Product workflows
How to Make a Product Video With AI: Photo, Shot List, Clip, Edit
A product video in five steps: pick the platform and its size, prepare one photo, plan three shots, generate one AI shot and assemble the rest. Specs read Nov 5, 2026.
Video examples here were generated on Cicadas and keep their model, settings and date. Cicadas earns money when you generate with these models. How we test
- Test window:
- 2026-09-08 – 2026-09-30
- Clips recorded with these models:
- 11
- Models:
- Kling 3.0 Pro
- Their provider cost:
- ≈$6.16
- Selection:
- every clip we keep is listed with its settings, cost and request ID; failed or discarded runs are listed in the test record.
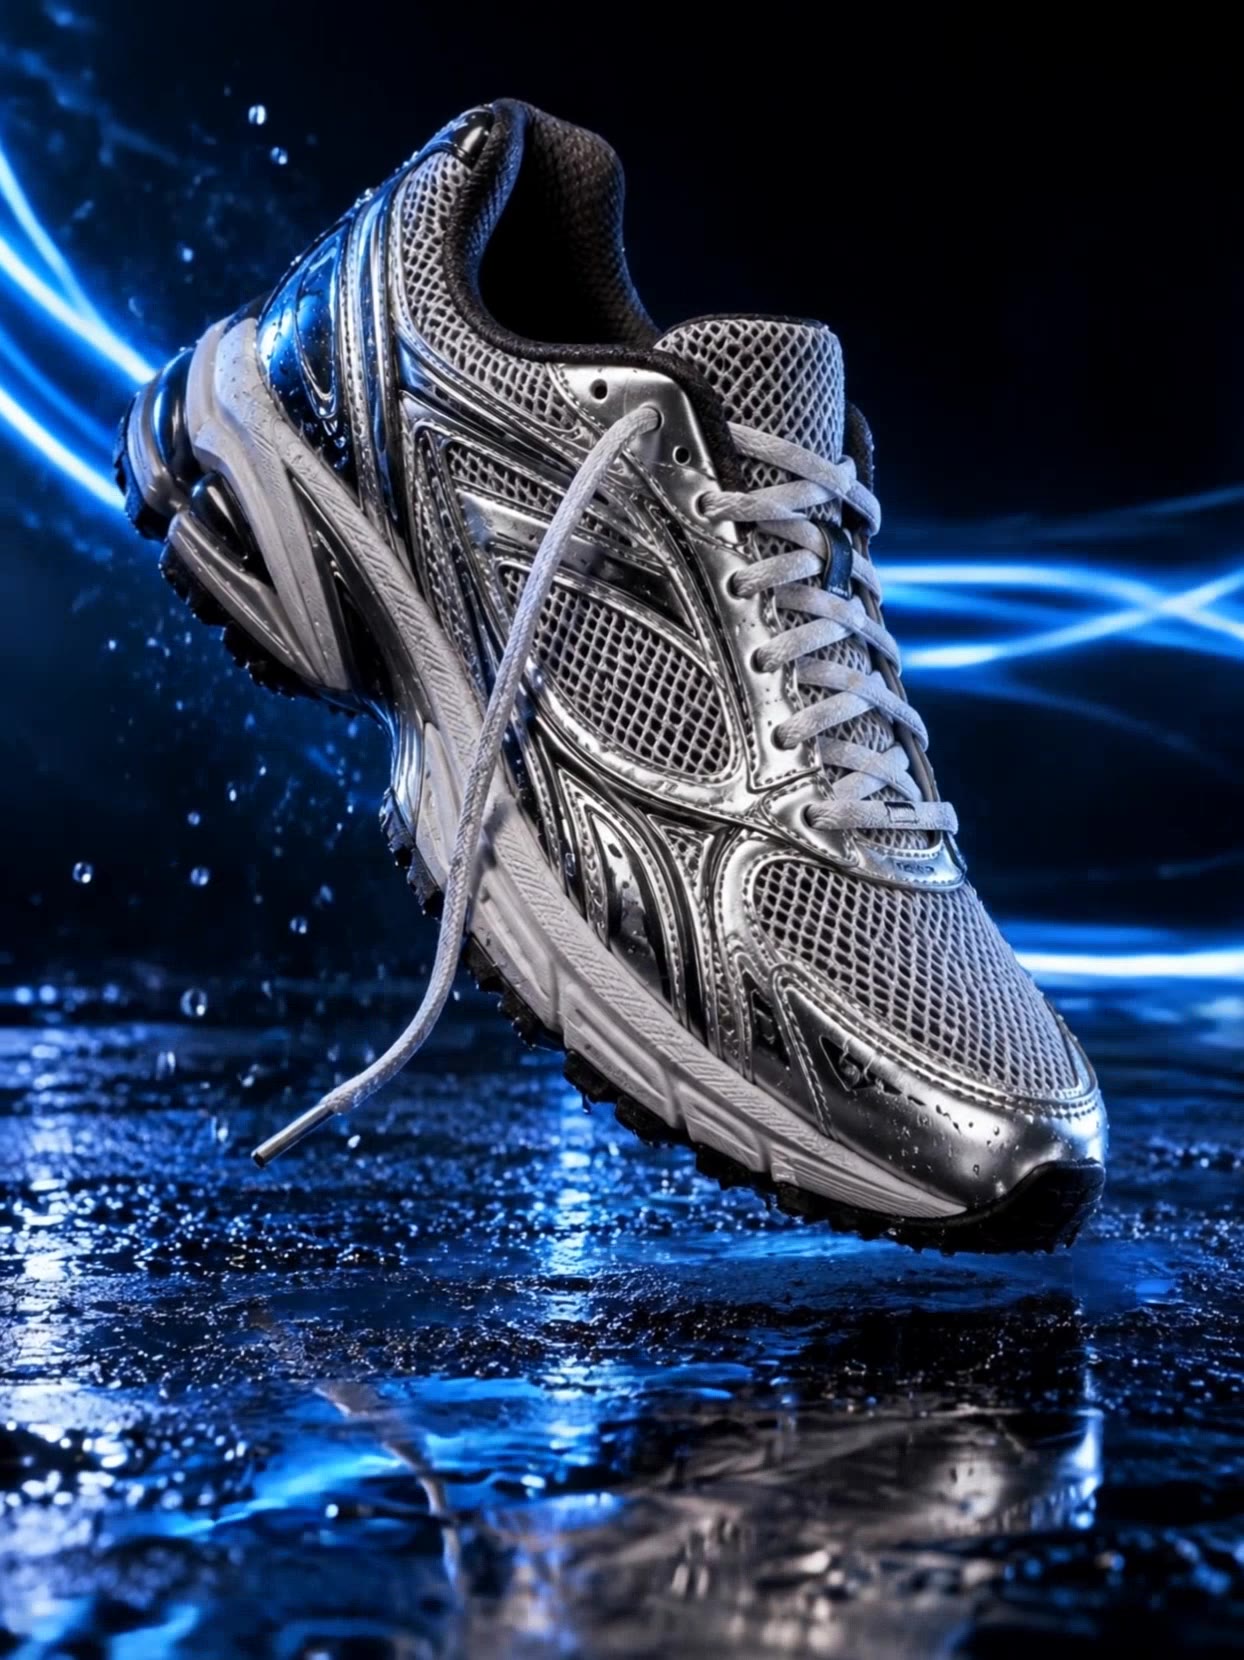
Short answer: decide where the video will play first, because that sets its shape and length. Then take one clean product photo, plan three shots (the product moving, a detail, an offer card), generate only the shot your photos cannot show, and assemble the rest from material you already have in the AI product video maker. A 5-second AI shot on Kling 3.0 Pro is 140 credits; arranging your own photos and clips uses none.
We make Cicadas, so our tools appear in this guide. The three AI shots below were each generated once on Cicadas on September 8, 2026 from original product stills of ours (no customer's product), and every price comes from the site's price table on November 5, 2026. Platform limits were read the same day on Shopify's help center and in Amazon's seller forums; where a platform did not publish a number we could find, we say so instead of guessing.
Step 1: decide where the video plays
A product video is rarely watched in one place. Write down the two or three places this one has to work before you open any tool, and take the strictest shape and length among them.
| Where it plays | Shape to make | What the platform says (read Nov 5, 2026) |
|---|---|---|
| Shopify product page | 16:9 or 1:1 | Uploaded videos up to 10 minutes, 1 GB and 4K (4096 × 2160), as MP4, MOV or WebM; up to 250 images, videos and 3D models per product. YouTube and Vimeo embeds skip these limits. |
| Amazon listing | 16:9 | Seller help quoted in Amazon's seller forums: MP4 or MOV, up to 1080p and 5 GB. Check the current page in your own Seller Central before uploading. |
| TikTok, Instagram Reels, YouTube Shorts | 9:16 | Vertical full screen; 1080 × 1920 is the size the guides we read agree on. We did not find an official length limit for shop videos that we could confirm. |
Studio on Cicadas offers the same three shapes (9:16, 16:9 and 1:1) when you start a project, so the choice you make here carries through to the export.
Step 2: prepare one photo
The AI shot can only be as good as the still it starts from. Use a photo where the product fills at least half the frame, the edges are sharp, and nothing is cut off in the direction the camera will move. A plain or dark background gives the model less to invent. Crop it now to the shape from step 1: the clip keeps the shape of the photo, whatever the request says. If the product has a logo or small print, photograph it straight on: angled text is the first thing a model bends.
Leave the price, the discount and the brand line out of the photo. They go on as text in the edit, where they will be spelled exactly as you wrote them.
Step 3: plan three shots
Most short product videos need three shots, and only one of them needs AI:
- The product in motion. Light moving over it, the camera easing around it, steam or water near it. This is the shot a photo cannot give you, so it is the one to generate.
- A detail. A second photo or a phone clip of the texture, the clasp, the sole. Your own footage is more accurate than a generated close-up.
- The offer. Name, price or call to action on a plain card. Make it with the free text animation maker, which sets your words in a font instead of drawing them.
Here are the three "product in motion" shots we recorded, all on Kling 3.0 Pro image to video, 5 seconds, silent:
| Product | Motion asked for | Shape | Provider cost | Credits today |
|---|---|---|---|---|
| Silver running shoe | Motion asked forSlow 20-degree orbit, blue light trails behind | ShapeAsked 9:16, got 720 × 960 (3:4) | Provider cost$0.56 | Credits today140 |
| Coffee cup and croissant | Motion asked forSteam rising, very gentle push-in | Shape16:9, 1920 × 1080 | Provider cost$0.56 | Credits today140 |
| Gold ring with a champagne stone | Motion asked forLight sweeps across, camera locked | Shape16:9, 1920 × 1080 | Provider cost$0.56 | Credits today140 |
The shoe shows the catch: the request said 9:16, but the file kept the 3:4 shape of the photo it started from. Crop the still to the shape you will publish before you generate, not after. The coffee and ring shots each have their own walkthrough: the coffee product video guide and jewelry video from a photo.
Step 4: generate the one AI shot
A product prompt has three parts: what moves, what must not move, and what must never appear. This is the shoe prompt as we ran it:
A silver running shoe floats above the dark studio floor. Camera makes a slow 20-degree orbit while blue light trails pass behind the shoe. Preserve the sole, laces and material details. Product commercial, single continuous shot, no added logos or text.
The movement is one camera move of a stated size. The product is named as something to preserve, part by part. The last line rules out the two things models like to add to an ad: extra logos and lettering. If your first take drifts, make the movement smaller before you make the prompt longer.
On the AI product video maker an added AI shot shows its credit quote before you submit. For more models and camera presets on the same photo, use image to video; for how the same coffee, ring and perfume photos turned out on two or three models each, see product video AI models compared.
Step 5: assemble the video
Open the product video maker, choose one to three of your photos or clips (the accepted AI shot can be one of them), and write three things: an opening caption, one product detail and a call to action. After you sign in and choose Upload and open editor, they become a saved three-scene project in Studio, where you reorder scenes and adjust captions, timing and crop. Uploading, editing and exporting your own media use no AI generation credits. The project waits in My projects until you come back to it.
Two free browser tools help at the end, and neither uploads your file:
- Loop video repeats a short clip 2 to 10 times into one MP4, for a product page player that should keep moving.
- Video to frames pulls PNG or JPG stills out of the finished clip, for thumbnails and for checking the product frame by frame.
Check before you publish
Play the AI shot to the end and pause on the first, middle and last second. Compare the product with your photo: the outline, the logo, the number of laces or prongs, the colour of the stone. Look behind the product for anything that was not in the photo. Then check that the captions say only what is true of the product; the maker places the words you write and does not check claims.
Questions
Can I make a product video with AI for free?
Partly. Arranging your own photos and clips into captioned scenes on Cicadas uses no AI generation credits (account limits still apply), and the loop, text animation and frame tools run free in your browser with no watermark. A generated AI shot is paid: 140 credits for 5 seconds on Kling 3.0 Pro, about $1.39 on the $9.90 first pack of 1,000 credits, shown before you submit.
How long should a product video be?
As long as the place it plays allows and no longer than the message needs. Shopify accepts uploaded product videos of up to 10 minutes, but a product page clip usually only has to show the product turning, catching light or being used. Our finished coffee example is 15 seconds: three captioned scenes.
Will the AI change my product?
It can. In our three recorded shots the cup, the ring and the shoe kept their shape, but a model redraws every frame, so logos, small text and stitching are the first things to drift. Write in the prompt what must stay rigid, keep the movement small, and compare the last frame with your photo before you publish.
Which aspect ratio should I use?
Vertical 9:16 for TikTok, Reels and Shorts; 16:9 for a product page or YouTube; 1:1 when one file has to sit in a square feed. Crop your photo to that shape before you generate: on Kling 3.0 Pro the clip follows the photo, so our shoe request said 9:16 but came back 720 × 960, the 3:4 shape of the still.